

Step by Step Guide Dedicated Device Enrollment using Microsoft Intune.
Android Enterprise dedicated devices
Single-use systems for business owners like automated signage, ticket printing, or handling stocks. Admins block computer use for a small range of programmes and site connections. It also prohibits consumers from installing new applications or performing any system behaviour.
Requirements for devices
Apps must satisfy the following needs to be operated as a dedicated Android Business device:
- Version 6.0 and above for Android OS.
- Devices are required to operate a Google Mobile Services (GMS) Android delivery. Phones must be GMS-accessible and should link to GMS.
Create a device group
You can target apps and policies to either assigned or dynamic device groups. You can configure dynamic AAD device groups to automatically populate devices that are enrolled with a particular enrollment profile by following these steps:
- Sign in to the Microsoft Endpoint Manager admin center and choose Groups > All groups > New group.

- In the Group blade, fill out the required fields as follows:
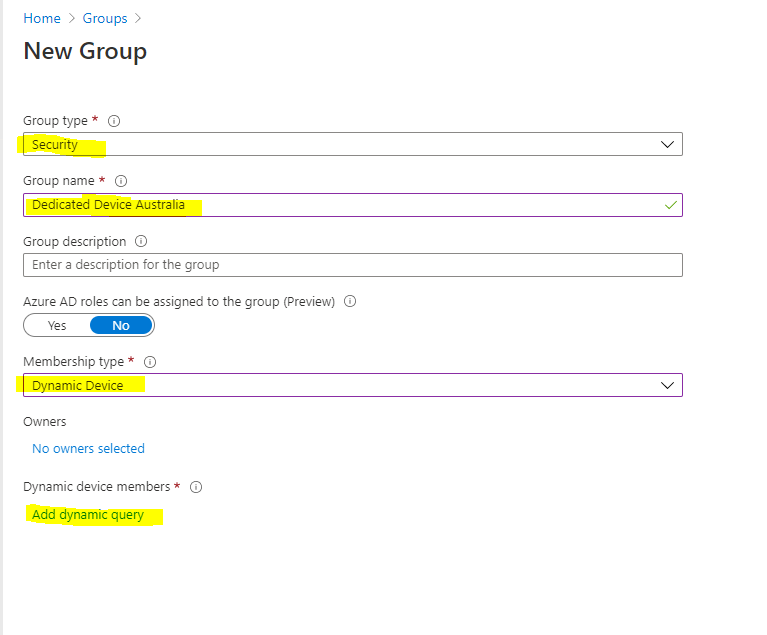
- Group type: Security
- Group name: Type an intuitive name (like Dedicated Device Australia)
- Membership type: Dynamic device
- Choose Add dynamic query.
- In the Dynamic membership rules blade, fill out the fields as follows:
- In the last box, choose Edit.
- Type: (device.enrollmentProfileName -match “DedicatedDevicesAustralia”)
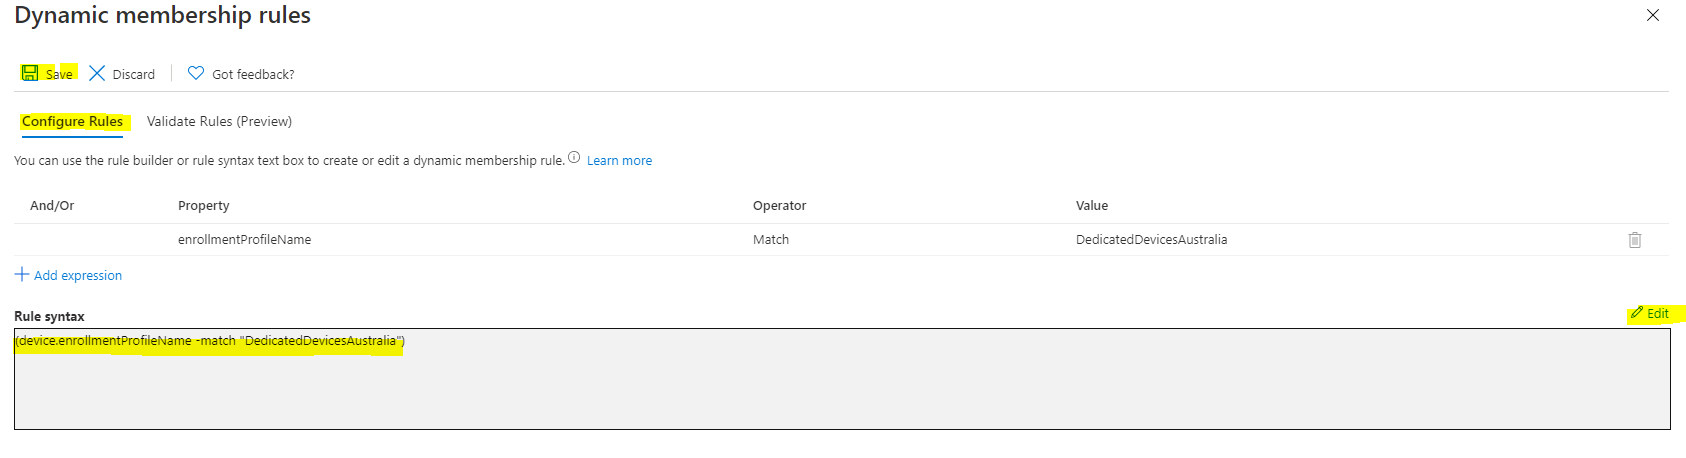
- Click, Okay.
- Click Save.
- Now click, Create button.

- Dynamic Security Group has been successfully created.
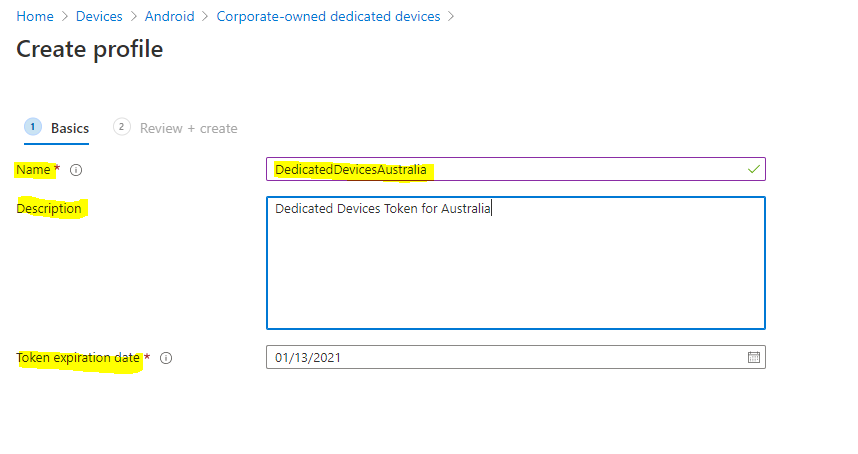
Create Token
Now you need to create a token for Android Devices with name of “DedicatedDevicesAustralia”
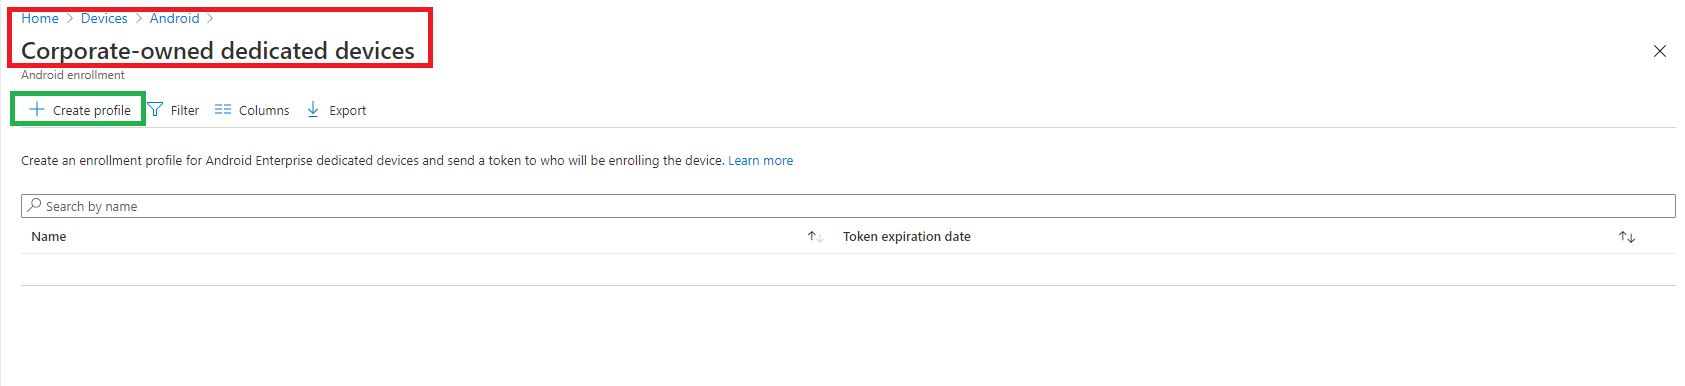
- Go to Devices > Android > Android Enrollment.

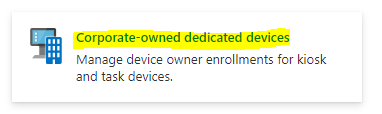
- Click on Corporate-Owned Dedicated Devices
- Click on Create Profile:
- Fill the details into Create Profile form.
- Name: Type the exact name you have mentioned in the Dynamic Query while creating the group. Here I would use “DedicatedDevicesAustralia”
- Description:
- Token expiration date
- Click Next.

- Click Create.
- Once you click on Create button, a token will be created which you can find clicking on the token, then click on token and then show token:

Create Configuration Profile
Now you need to create a Device Restriction Configuration profile using Android Enterprise and Fully Managed, Dedicated, and Corporate-Owned Work Profile Section.
- Go to Devices > Configuration Profile.
- Click on Create Profile:
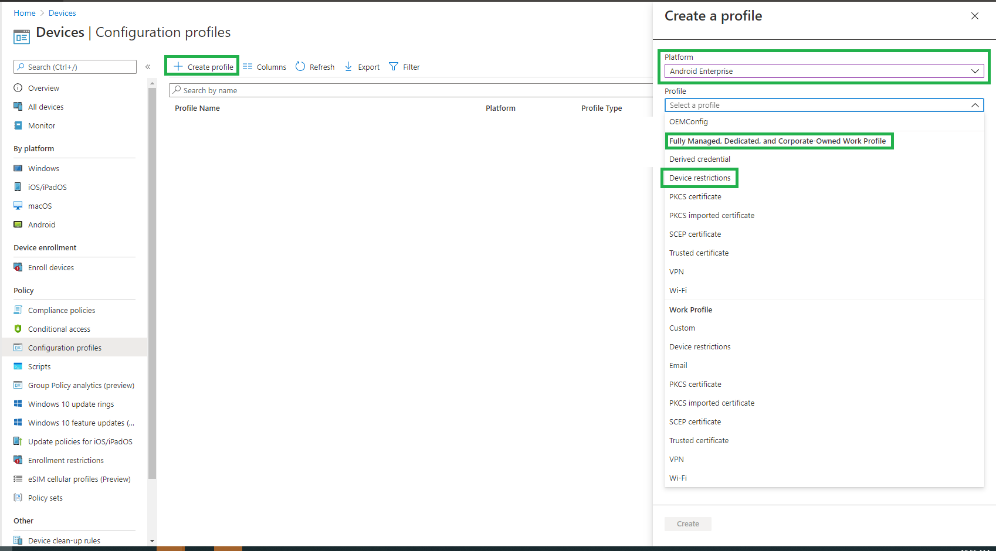
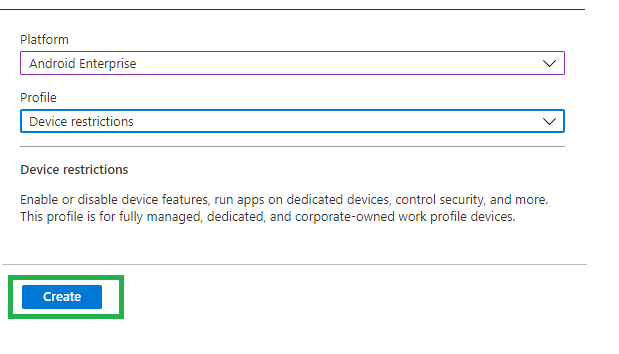
- Select “Android Enterprise” in the Platform.

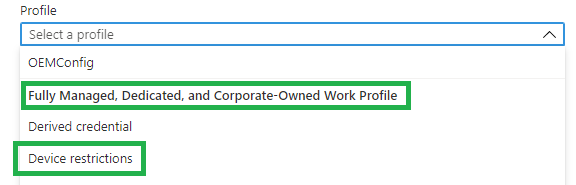
- Select “Device Restrictions” under “Fully Managed, Dedicated, and Corporate-Owned Work Profile”.
- Click on the Create button.
- Now you need to fill the profile creation form and configuration settings.
- Name
- Description
- Platform
- Profile Type
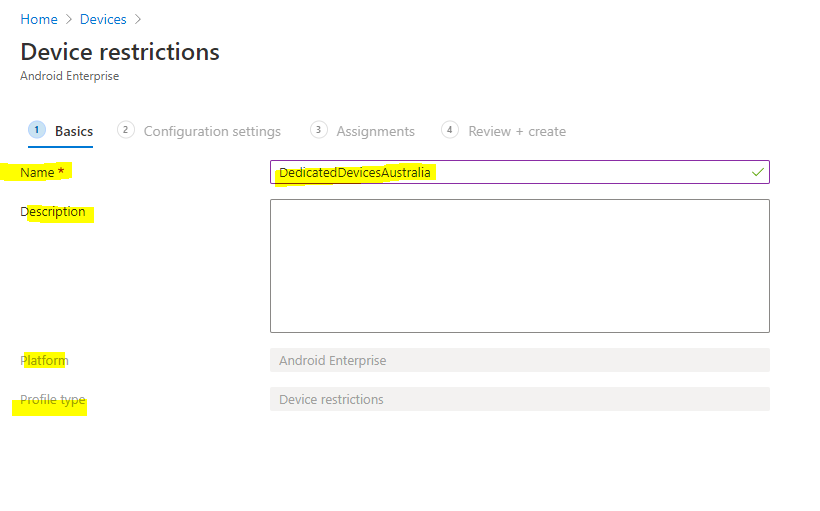
- Click Next.
- Here is the Configuration Settings Tab where you will configured desired device rescritons:
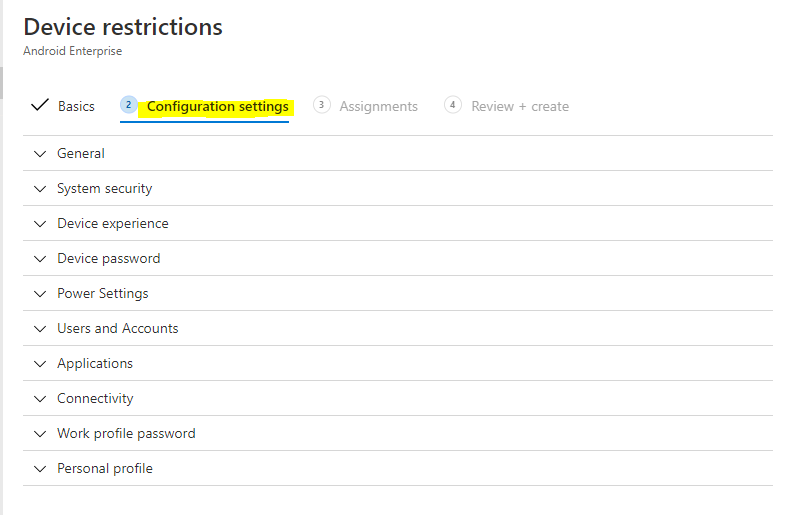
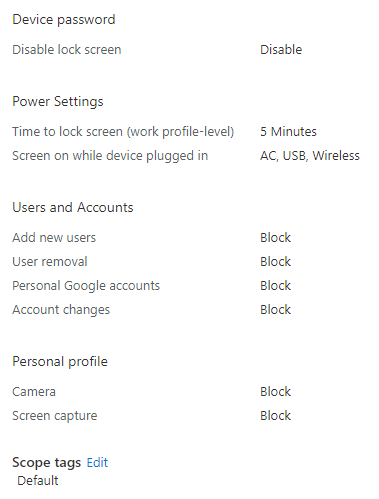
- Click on each tab and select required restrictions. In my demo I have selected these:

- After selecting Configuration Settings, click Next.
- In the assignment tab, select groups.
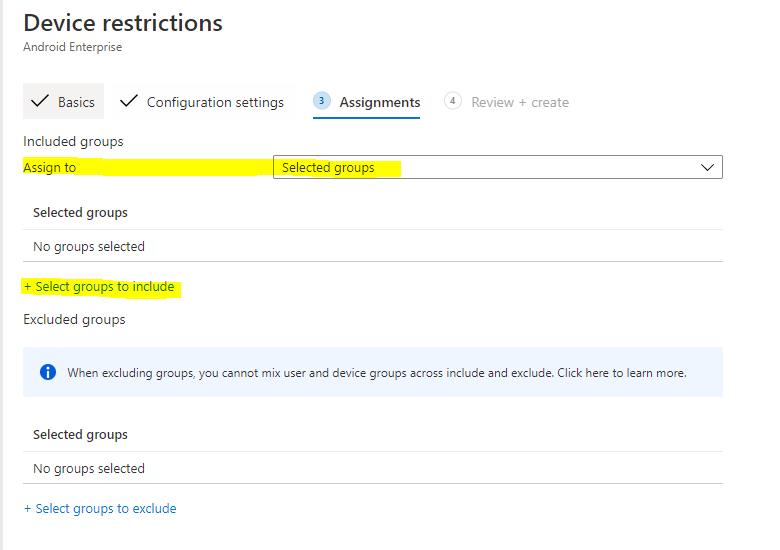
- Like in the demo, I have created a group and that one I will select.
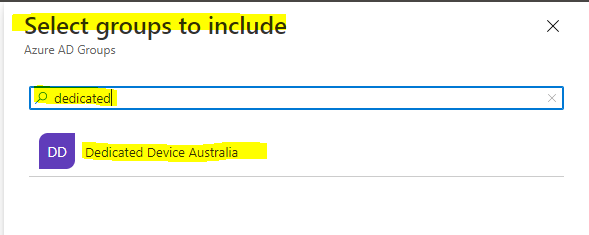
- Click Select button. Make sure that correct selected group is listed here:
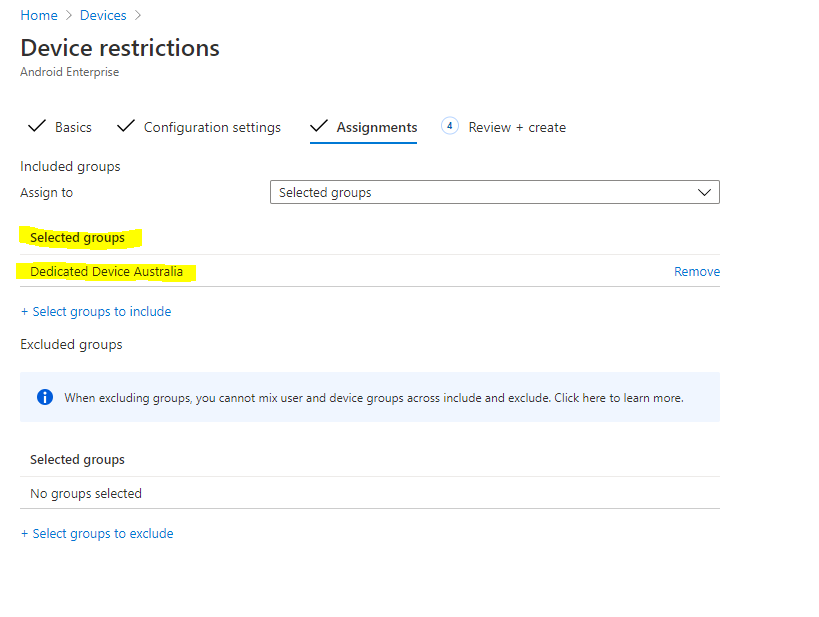
- Click Next.
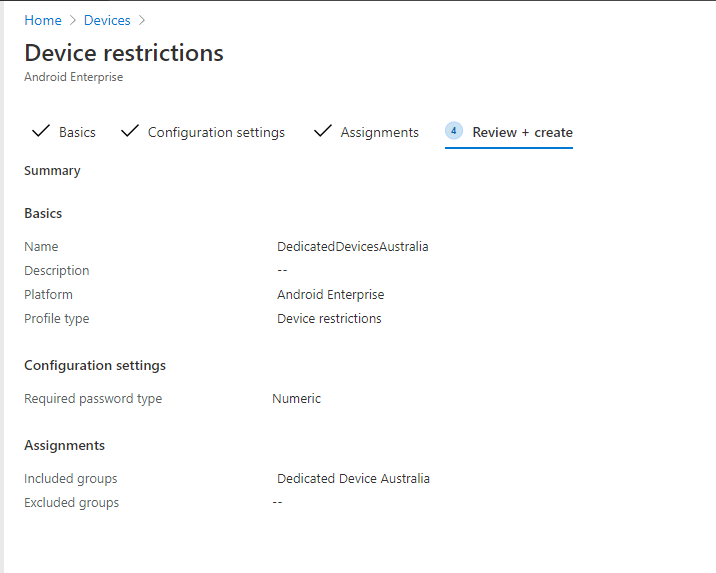
- Review and click on Create.
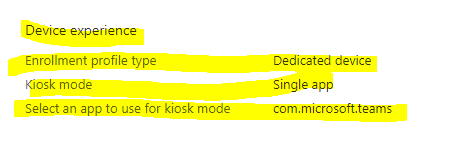
In the profile creation section, make sure you have selected the required app in the device experience section:
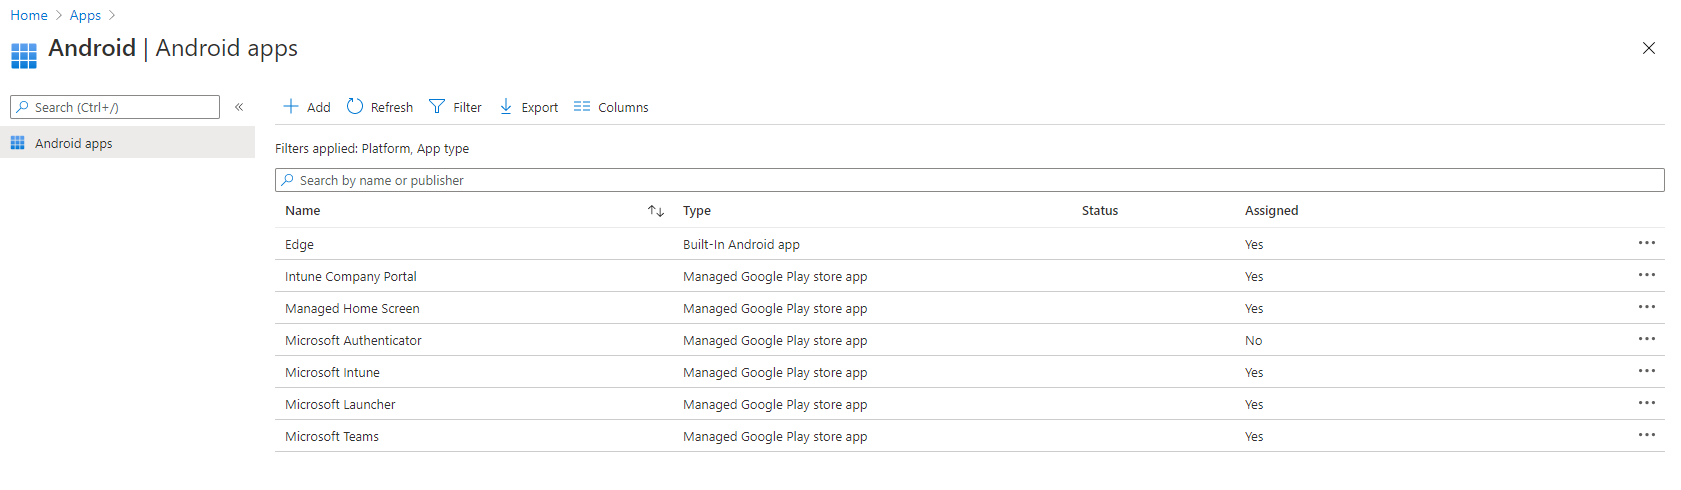
You can create/edit apps in the Apps section. Home > Apps > Android > Android Apps. You also need to setup Google play store if you have no already done.
Now we are ready to test the configuration with Android Mobile device. You may watch the youtube tutorial link given below for mobile device step-by-step guidance.
Previous Blog on Office 365 vs Office 2019


